Step-by-Step Donation Guide
This page is best viewed on a desktop/pc/laptop.
Step 1: Select the desired amount, or use the middle button to be able to select a custom amount.
Step 2: If you selected “Donate Custom $ Amount”, the following screen will be visible:
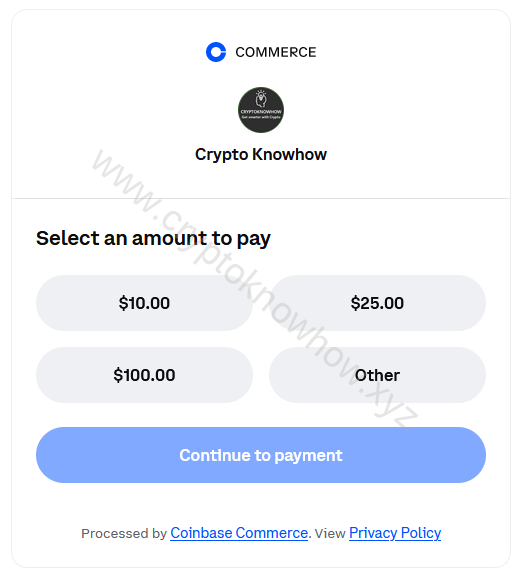
If you selected a fixed amount, the corresponding amount will be shown on the screen. In this example we selected “the $ 10 button”:
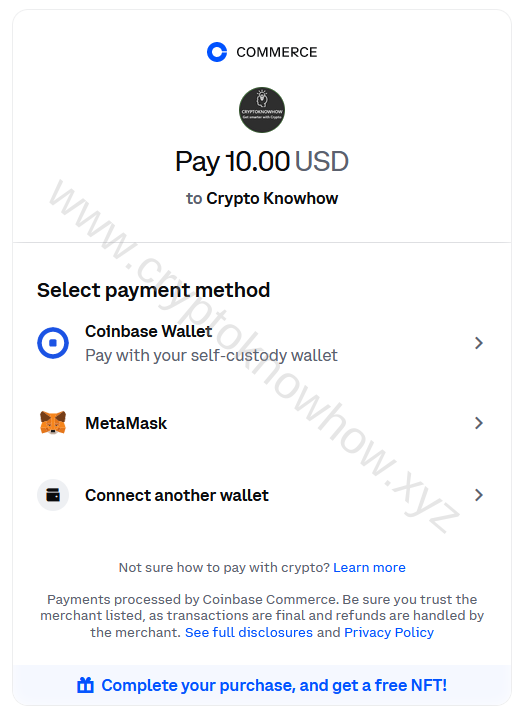
Step 3: After having selected an amount, you are able to connect your web3 wallet. This can be the Coinbase wallet, Metamask wallet, or any other of the supported EVM wallets. Most of these wallets support the option to top up with $ USD, € EUR, or other supported currencies.
Step 4: In this step we show 2 different wallets going through the process. It seems a bit long and strange at first, but after getting used to it is so easy. The wallets used in the examples are 1. Coinbase Wallet and 2. Metamask wallet.
4.1 Coinbase Wallet:
Make sure you have the correct amount of funds available in your Coinbase wallet (if you need help with getting set up there, please check this page). For this guide we are using the mobile phone and Coinbase wallet app. It is also possible to work with a Coinbase wallet browser extension, the steps will look slightly different. The next steps show the complete process:
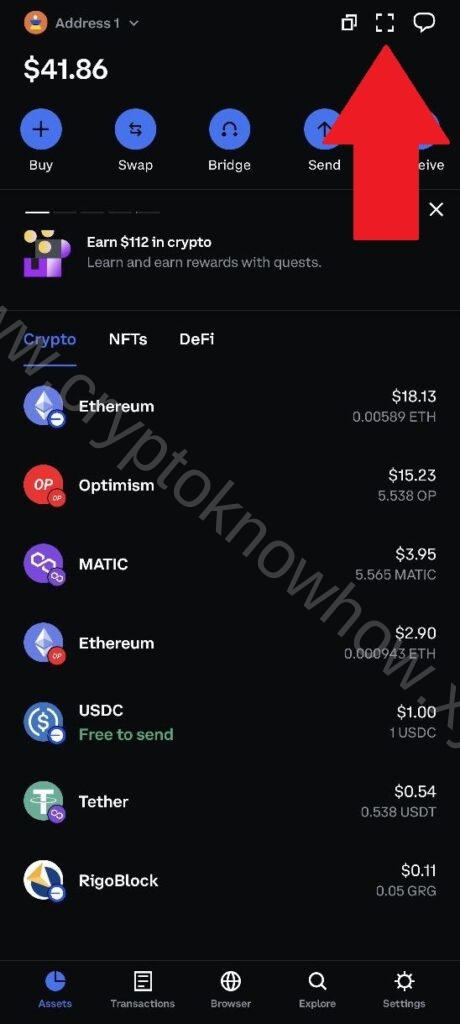
1. Check your ETH on BASE*

2. Select QR Scanner
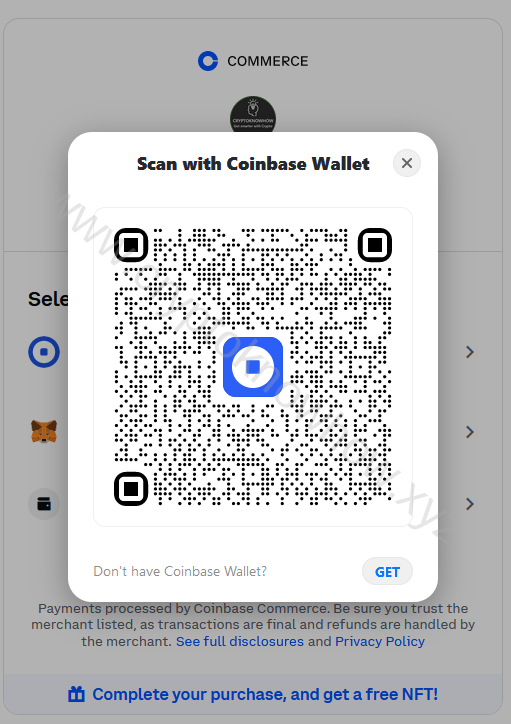
3. On PC/MAC, select ‘ Coinbase ‘
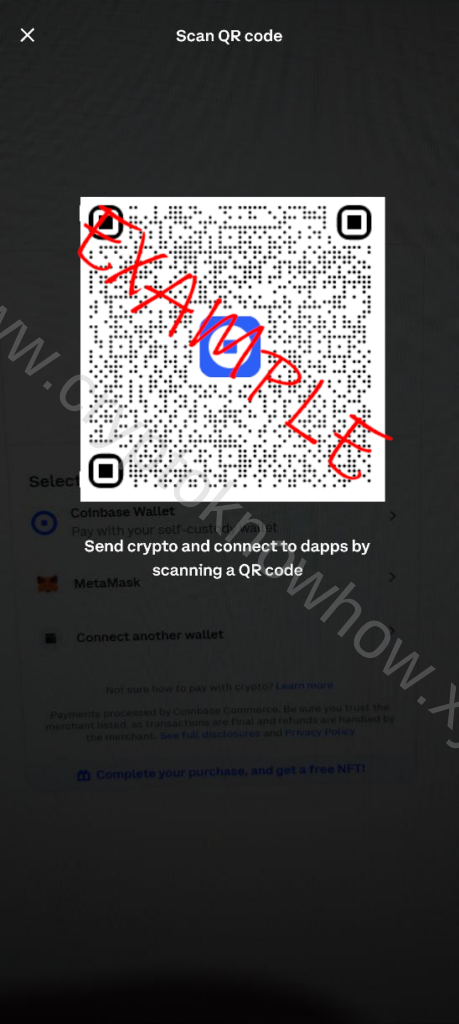
4. Scan the QR Code.
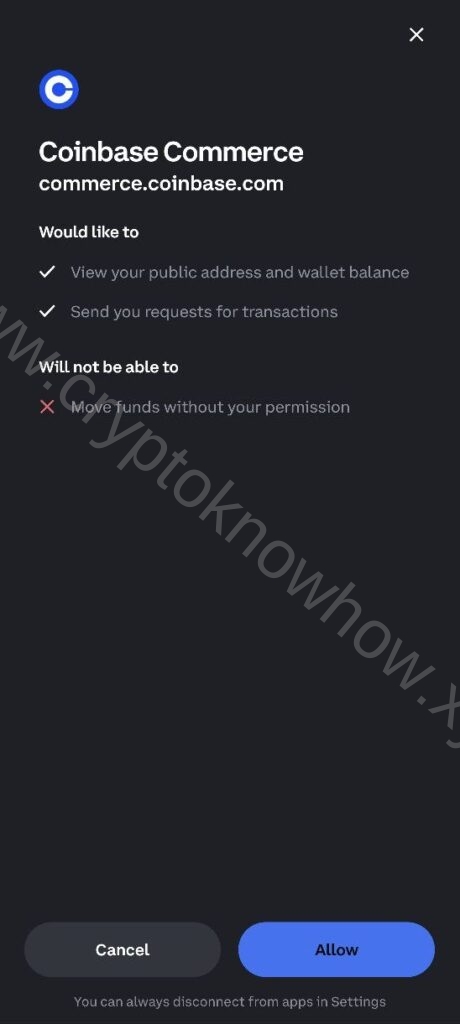
5. Connection request, select Allow.
6. Connection confirmed.
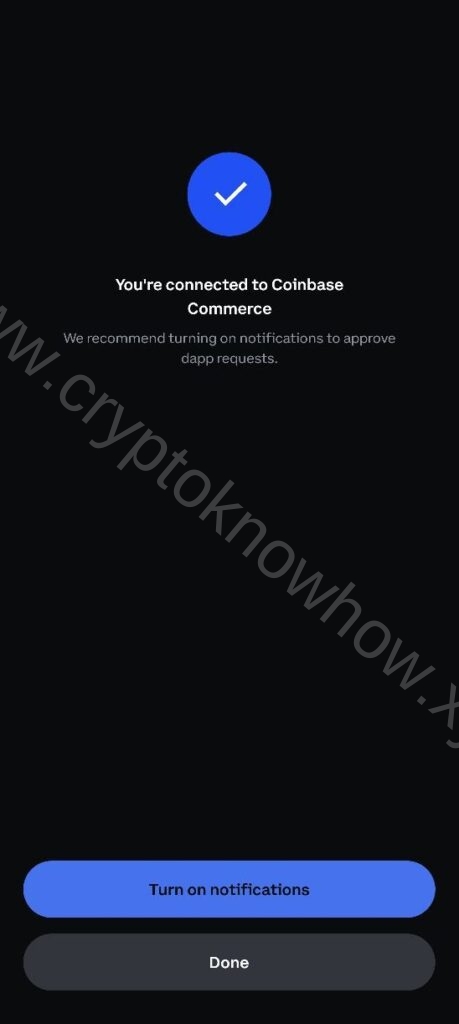
7. Proceed on Coinbase Commerce.
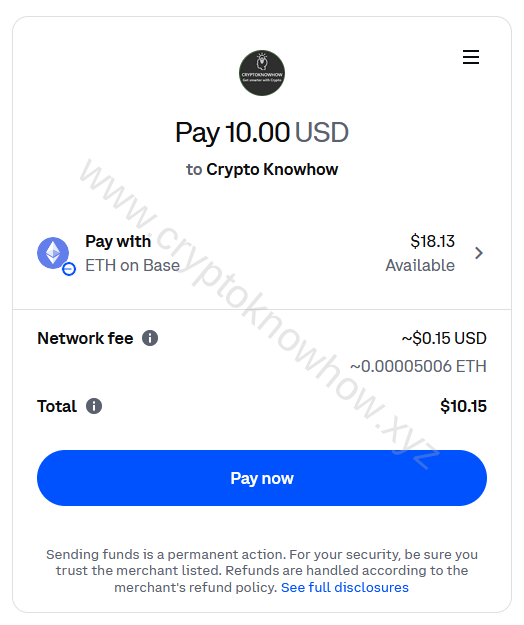
8. Your App requests confirmation.

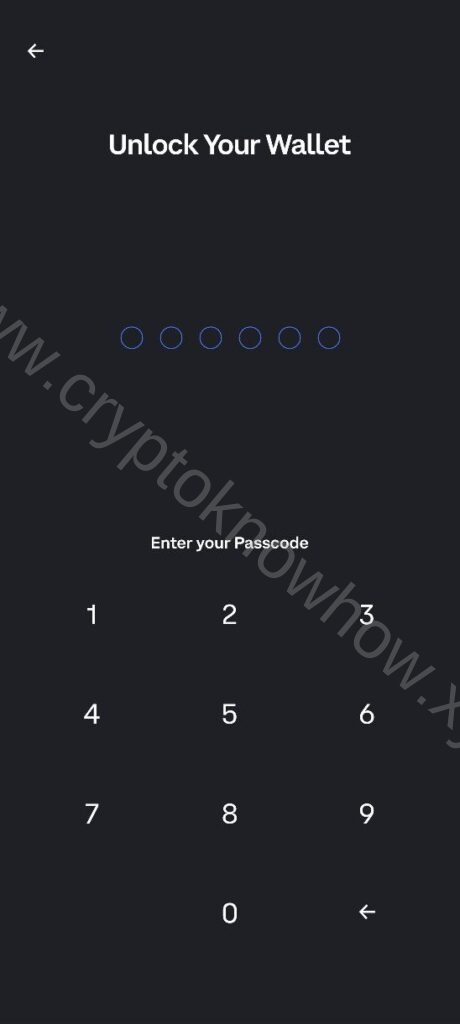
9. Confirm with your Passcode.
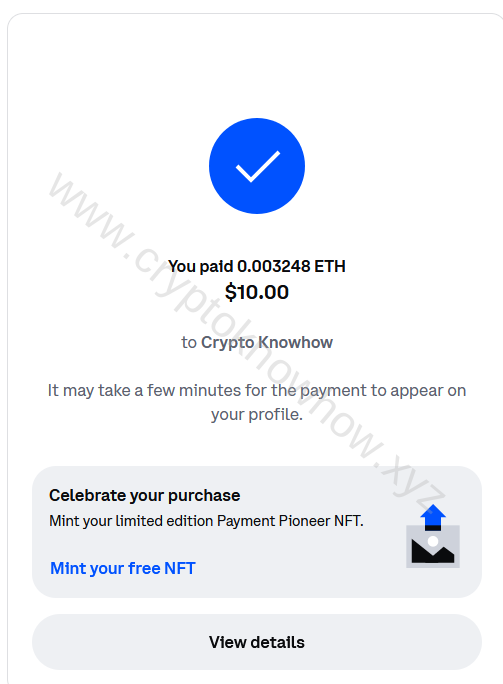
10. The payment confirmation.
* You can also use other chains than BASE, however, the gas fees are very low on BASE compared to for example Ethereum and therefore shown in this example.
4.2 MetaMask Wallet:
Make sure you have sufficient funds available in your MetaMask wallet. In this example we will donate the equivalent of $ 1 using the Polygon network and the crypto MATIC. If you need help with getting set up with wallets and blockchains, please check this page. For this guide we are using the PC with the MetaMask browser extension app. It is also possible to work with a MetaMask on mobile, the steps will look slightly different. The next screenshots will walk you through the steps:
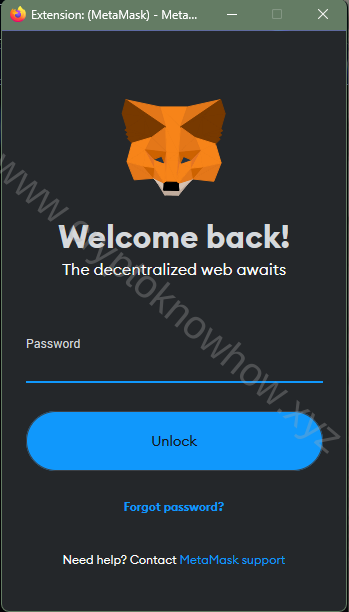
1. Login to your MetaMask wallet.
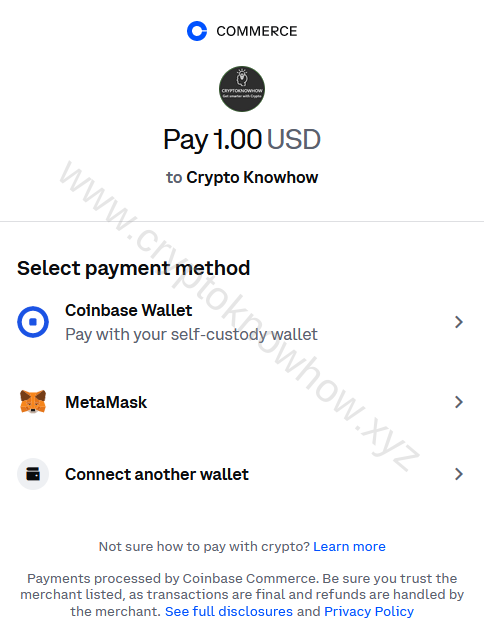
2. Select MetaMask on the donation page.
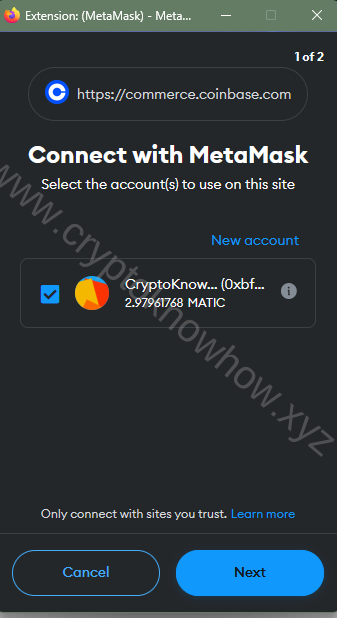
3. A connection request will pop up on your MetaMask app. Select ‘Next’.
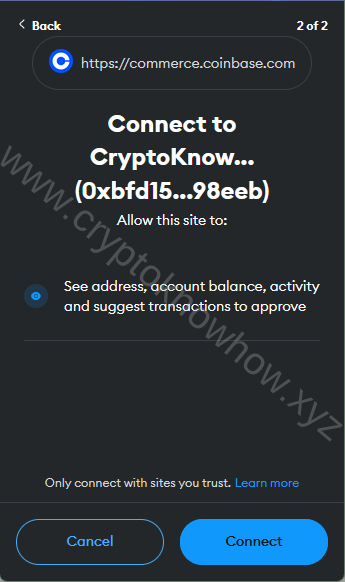
4. Review permissions before making the transaction.
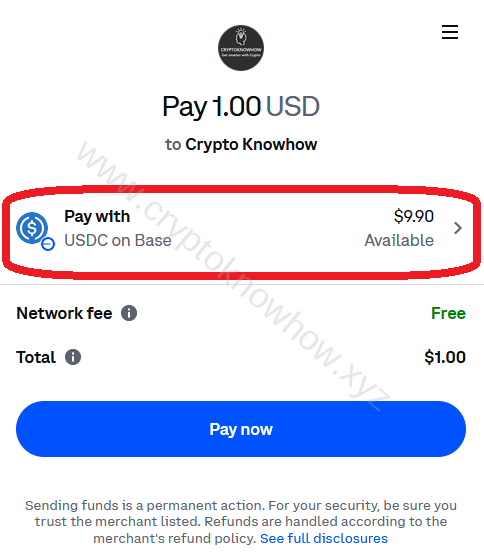
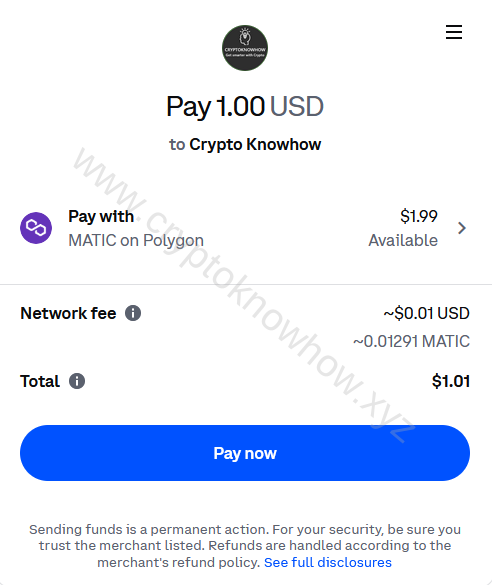
5. Back on the webpage, you now see the total amount, and the payment method. We will not use Base but Polygon in this example. Select ‘Pay with’ to change to your desired option.
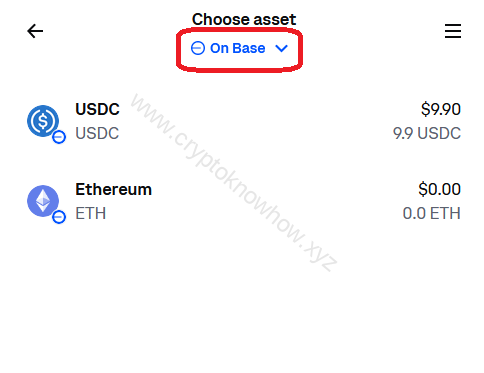
6. You now can change the currency. But also the Network, which we will do. Select the drop-down menu.
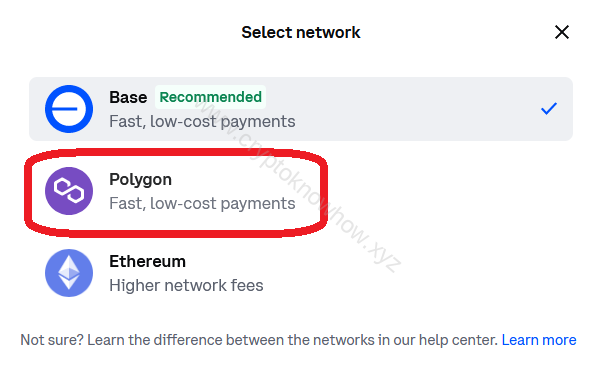
7. In this menu we select ‘Polygon’.
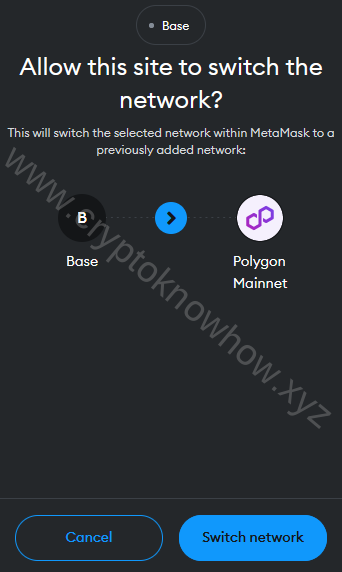
8. Your MetaMask wallet will now request to switch the network. If you haven’t added it yet, it will suggest the network parameters, automatically.
9. After you have switched the network, you can select the currencies you have in your Polygon wallet. We will use MATIC.

10. The overview now shows 1 USD equivalent in MATIC paid on the Polygon network. If all is good, we select ‘Pay now’.
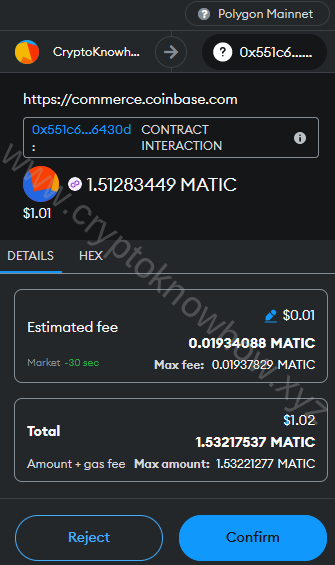
11. Your MetaMask wallet will now show the transaction request.
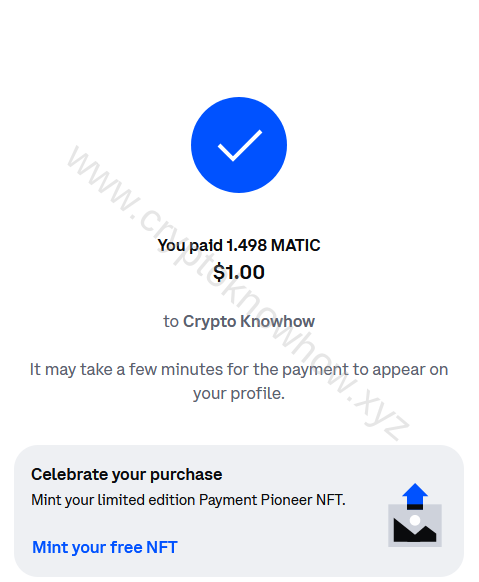
12. After you have confirmed the transaction the webpage will now display a confirmation.
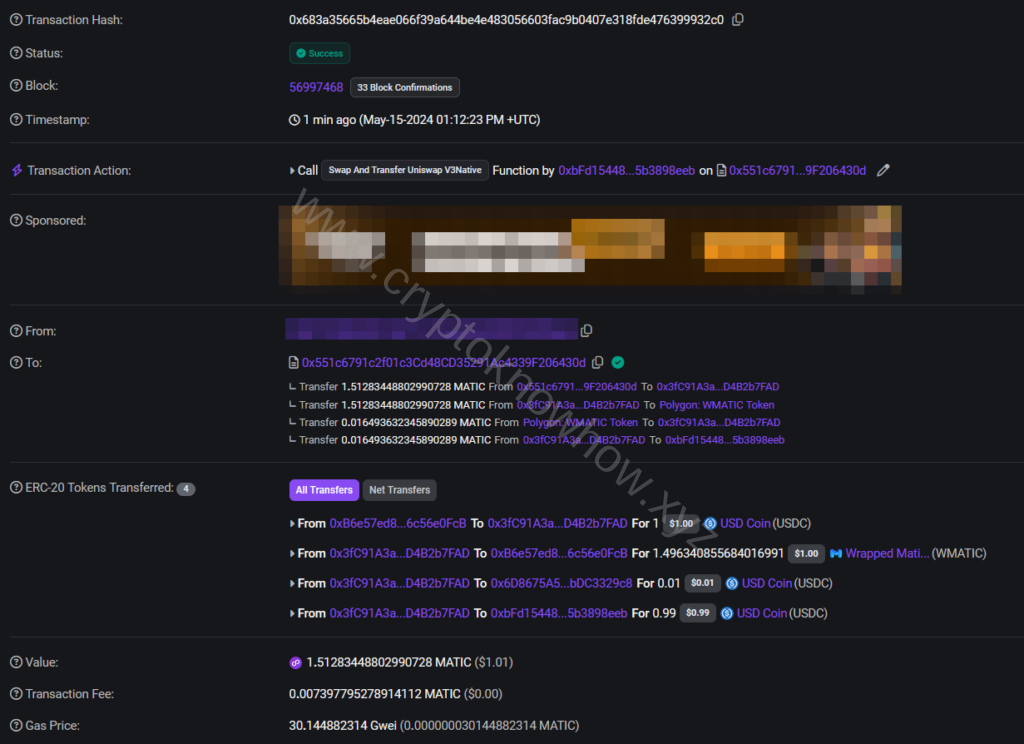
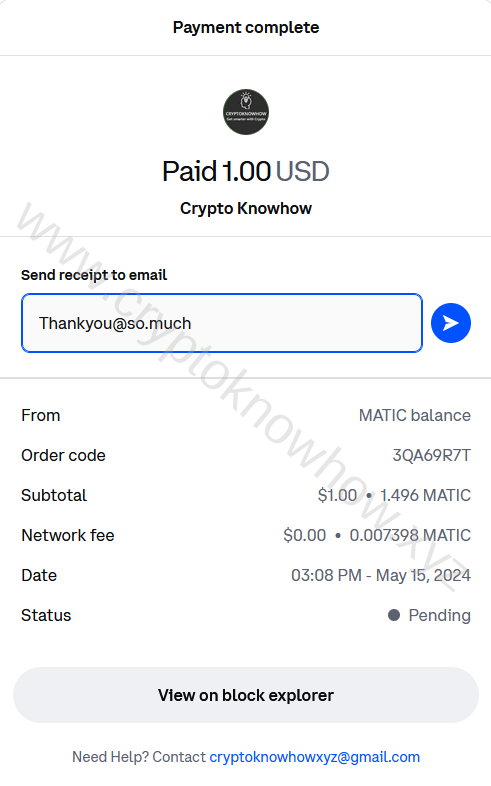
13. When the transaction is confirmed on the blockchain you can email yourself a confirmation. You can also click ‘ View on block explorer’ to see the details.
14. The transaction confirmed on the blockchain. Here you can see when the transaction was made, which wallet initiated it, with which contracts have been interacted (MATIC > WMATIC > USDC in this example), which gas fees applied finally, transactions amounts, and much more.