Own Crypto
Learn more on how to get started with crypto and to become an owner of cryptocurrency.
Important to note before you get started with crypto
This is in no way meant as investment advice. This page is educational on how to get started with crypto and to become an owner of cryptocurrency. (Tax) laws apply to cryptocurrency which is in every country differently arranged. Therefore it is your own responsibility to comply with cryptocurrency rules that apply to you. As always, even if names of exchanges or instances are mentioned, it is in no way an recommendation to use them and still do your DYOR.
We already explained about: Bitcoin, Cardano, Ethereum, Litecoin, Monero, Polkadot, Ripple and MATIC. The guides below offer purchase options for all of those. To help you get started with crypto. However, keep in mind, this is NFA and merely examples of a few cryptocurrencies could be purchased via various routes.
Click the triangle to fold the relevant section open
Method 1 – Cryptocurrency exchange
Step 1 – Register on an exchange
Get started with crypto Exchange requirements: Identity documentation (Passport, OR driver license, OR ID Card), and up to two days time for account verification.
Many exchanges
According to CoinmarketCap, April 2024, there are 754 exchanges. Those are both centralized and decentralized. To ‘onboard’ with FIAT, the easiest is to do so through an centralized exchange. They allow for bank transfers to be done to your account. Once this is completed you can purchase cryptocurrency. We won’t mention/recommend specific exchanges to purchase crypto, but a simple list is available on either Coinmarketcap or Coingecko for you to see and investigate your favorite one from.
Each centralized exchange, comes with its own fees and fee structures. Also, do your research to see if the exchange offers the pair you wish to trade. Not all exchanges offer all cryptocurrency or work will all blockchains.
Once you have chosen your preferred exchange, go ahead and create an account!
Step 2 – Get verified on the exchange
Great, now you have an account on a centralized exchange! To get started on the platform, please follow up the instruction about getting KYC verified. You will need either a Passport, Driving license or ID Card. The verification itself doesn’t take long, a maximum of 15 minutes. Once you are done, wait until your documents and information are verified. This duration differs per exchange but shouldn’t take longer than 48 hours.
Step 3 – Deposit funds to an exchange
Once you are verified you are able to trade fiat for cryptocurrencies. Therefore, the next step is to get funds on the exchange. Decide for yourself an amount you are comfortable with, and only spend what you could afford to lose. Once you have decided for the amount, follow-up the instructions from the selected exchange to get your funds deposited. They will provide you with banking details which you are able to make the transaction with or provide information about other payment methods. The deposits go through fairly fast, but note, that sometimes the first deposit might take a bit more time.
Step 4 – Exchange fiat for cryptocurrency
Now that your funds are on the exchange, it is time to buy your first cryptocurrency! Depending on the chosen exchange, the interface will vary. We have included an example to show how to get there. In general, for most of them, go to ‘trade’, ‘spot’:
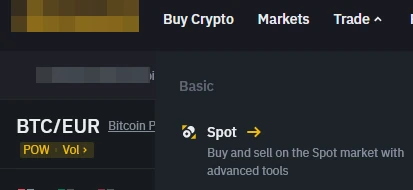
Select the cryptocurrency to get started with
Then select the cryptocurrency you wish to purchase, in this example we have funded the account with Euros and we will be buying Bitcoin with 100 EURO. You’ll see that most exchanges offer fancy overviews en graphing tools to analyze the price if you wish to do so. When you type EUR in the search field in the red marked square, you get all EUR/Crypto pairs visible. We have selected EUR/BTC (Bitcoin):

In this example we consider our purchase DCA therefore most of the prices have been blurred out as they are irrelevant to the purchase example.
Now that you have selected the pair, you are able to fill in the amount you wish to purchase. Fill out 100 EUR at the buy field, at ‘Total’ and then click ‘Buy BTC’:
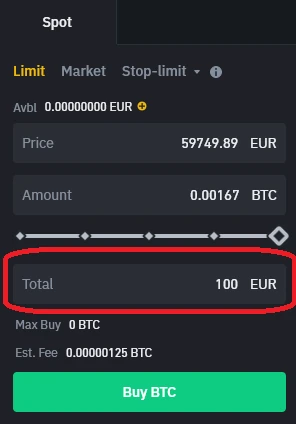
Congrats! You have now purchased your first Bitcoin and will receive 0.00167 BTC – 0.00000125 BTC exchange fee = 0.00166875 BTC ! 🎉
Step 5 – Wallets & Self custody
An important step to get started with crypto! Once you have purchased the Bitcoin, it is recommendable to not keep it stored on an exchange, but to manage it yourself in your own wallet. Not your keys, not your crypto! Of course, you need to learn to safely handle this, but if an exchange goes bankrupt, you would still have your funds in case of self-custody. To choose a wallet to manage your Bitcoin, it is best to use the questionnaire on the Bitcoin website: How to choose a wallet?
Once you have selected your desired wallet, follow the instructions from the wallet provider to create the wallet. Once created, you will find your public address. Use this public address now to withdraw your funds. We will show you in a few simple steps how to to do so from the exchange to your self-custodial wallet, which are on most exchanges, very similar to the examples used:
The first step is to go to your account dashboard on the exchange. On this screen, you often find a button like this ‘withdraw’ button, click it:

A new screen opens up with options to fill out. This is to make sure you will deposit the right currency on the right network to the right address. So this is what we are going to fill out in the example below. We want to withdraw 0.00166875 BTC to our Bitcoin wallet address. However, you will note the Network Fee in the below screen. The network fee of 0.00012 BTC is a combination of the exchange fee and gas fee. So we will withdraw 0.00166875 – 0.00012 = 0.00154875 BTC. That’s why we filled in 0.00154875 BTC in the below example. It will look like:
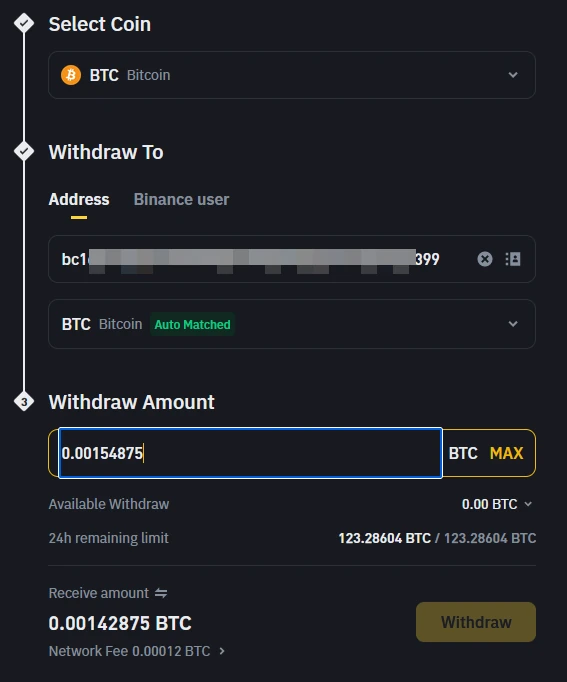
The Coin we wish to withdraw is BTC. We will withdraw to the given address. The Network is automatically recognized and selected. Bitcoin in this example. Then we fill the amount and select ‘Withdraw’. You then only have to go through your 2FA and you are done, the funds have been transferred to your wallet and are in self-custody!
Method 2 – Peer-2-Peer
Step 1 – Find your platform
If you prefer to stay away from crypto ATM’s, exchanges, or wallet purchases, you can also get started with crypto by leveraging P2P. Peer-to-Peer trading is nothing else than 2 people trading with each other without an intermediary using a decentralized platform. Therefore, the first step is to find your P2P platform.
Centralized exchanges offer P2P platforms as well, but we believe that it an intermediary in between and therefore get warmer from decentralized platforms for this route. We can’t recommend a specific one but would like to list a few to get you started to show what is out there. For decentralized P2P and no KYC required from our research: Bisq, RoboSats, Hodl Hodl, Agoradesk, or Localcoinswap.
Some platforms are designed to be very anonymous. They require advanced knowledge to operate on but offer also additional protection to you in terms of privacy. Each platform will have its own benefits and cons which either fit you or don’t. Therefore, DYOR, and select the one you like the most.
Benefits of P2P: Mostly no KYC, Direct trading as per your own pricing, low fees.
In this example we will buy 0.3 BTC using P2P trading.
Step 2 – Create an account
Sign up at your chosen platform. After having an account, you can either create a listing (your criteria for the trade) or browse already created listings. Some P2P platforms require you to install their software, and then browse the listings through here. For the sake of the example, we will continue with ‘browsing listings’.
Step 3 – Browse listings
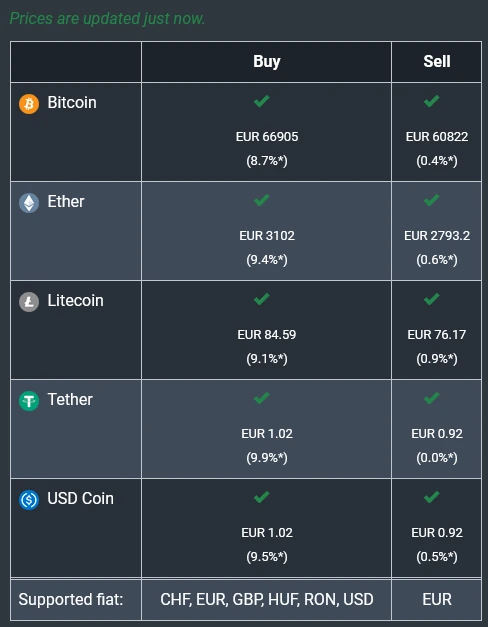
Always browse, because somebody might created a listing with a more favorable ratio than you initially planned to buy or sell for. We’ve taken a screenshot of a platform for reference:
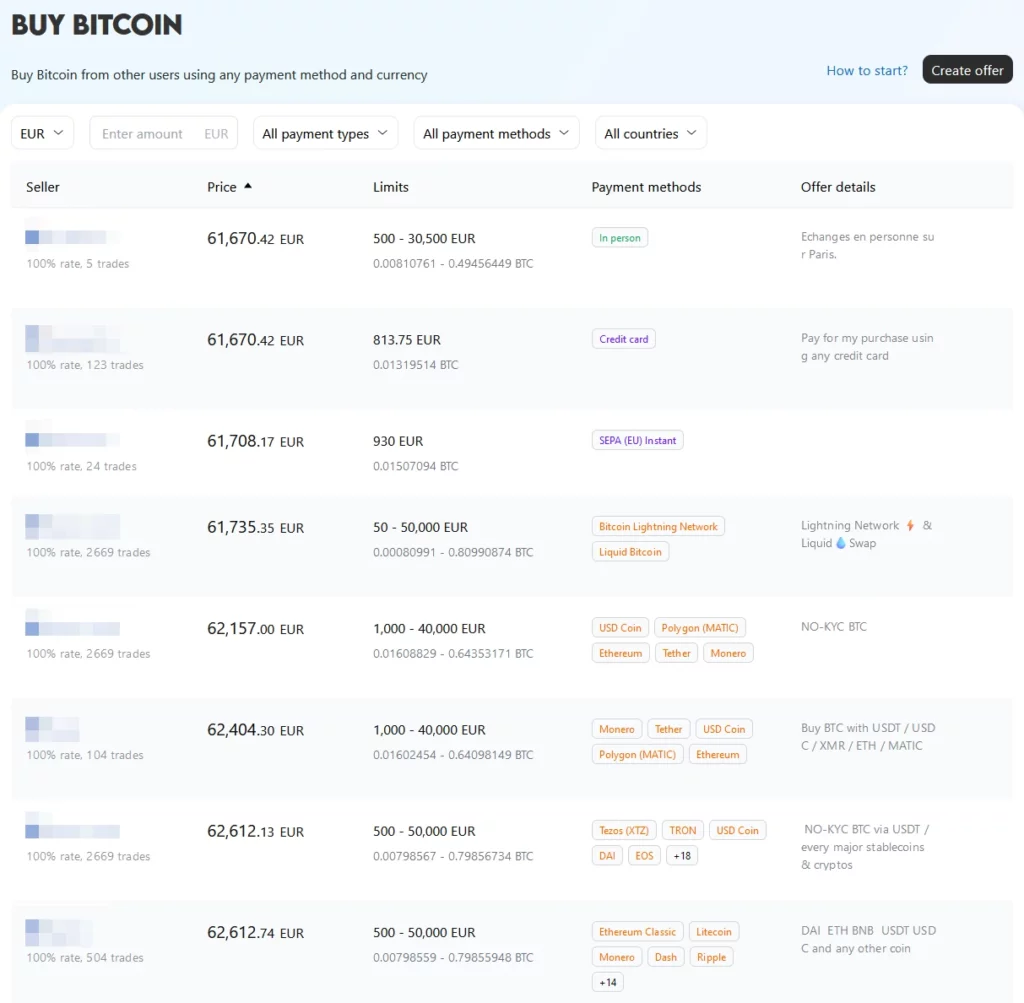
Most platforms offer a compelling overview with all the information you need. In this case in the first column you see usernames (blurred out), their trade succession rates and how much trades they have made. This way you built up a reputation on the platform and scammers will be filtered out. This certainly helps you find the more reliable traders.
Then simply check the price, the size of the trade (often within ranges) which payment methods are accepted and check the special remarks from the person who made the listing. The above screenshot shows in a great way how many options are possible. You can trade in person, Credit Card, Bank transfer, Other crypto, and whatnot. Lot’s of ways to pay, or get paid.
Once you have found your desired listing, click on it and proceed with the next step.
Step 4 – Initiate the trade
Now that you clicked the desired listing, a new window opens up with all the information necessary for the trade. Fill out the desired amount of Bitcoin you wish to purchase. For this example we will purchase 0.3 BTC and store it in our Bitcoin wallet as the first two red blocks indicate:
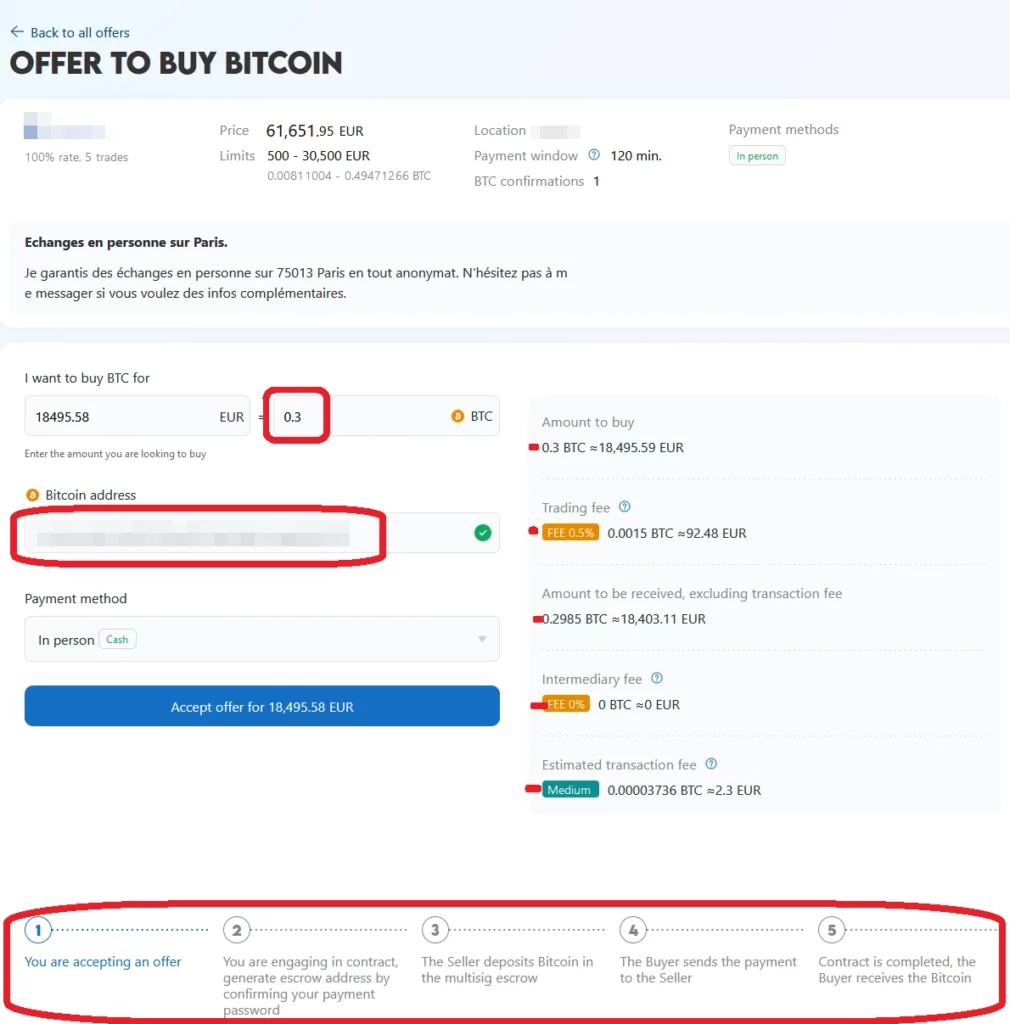
Then we have marked a few red dots on the right side, to show how transparent this trade is. You buy X, you have a trading fee of X (with explanation and will be split 50/50 between buyer and seller), how much you can expect to get in your wallet, which intermediary fee (not applicable) and the transaction fee to interact on the blockchain (gas fees).
At the bottom we have circled the steps to take to finalize this trade. We will now accept the offer and proceed to the next step in the interface.
Step 5 – The actual trade
What you’ll do now is making the multisig escrow agreement on the platform. This agreement you made on the platform is a safety step for you to receive your funds, for the seller as well. The seller will receive notification that someone has accepted his offer and that his action is required.
The seller is now able to deposit the Bitcoin in the multisig escrow. Once you as buyer see that the Bitcoin is deposited, you will make the actual transfer as per agreed method with the seller. By sending the payment, you will complete the multisig escrow contract, meaning that your Bitcoin will be released to your provided Bitcoin wallet.
Congrats! You have now purchased Crypto P2P! 🥳
Method 3 – Cryptocurrency ATMs
Step 1 – Preparation and tips
Preparation
To get started with crypto by buying cryptocurrency at the ATM is a relatively straightforward process. What you need in terms of preparation is to have a wallet that is able to accept the cryptocurrency you wish to purchase and to know where the ATM is. Due to the (criminally high) fees incurred, we don’t recommend buying cryptocurrencies at ATMs. Maybe only if you can find them below 2%.
Choose a wallet
Choose a wallet to manage your cryptocurrency. Different blockchains, different wallets. To learn more about wallets, please see our section Wallets. Once you have selected you favorite, follow the steps and create the wallet. When you have finished creating the wallet, you will have a public address which we will need in the later steps.
Another part of preparation is to find the Cryptocurrency ATM. Is it near you? To find out, simply visit this tool to see if there is one near you. At the time of writing, there are more than 37.500 ATMs worldwide.
Tips & Tricks:
- Always double-check your wallet address before completing the transaction.
- Make sure you have the equivalent you wish to buy in cash with you, most ATMs only accept cash.
- Be aware of the fees charged by the ATM, as they can be higher compared to online exchanges. Especially buying fees are high and sometimes almost 9%!! With proper research you can find lower amounts such as 3%, which is still high but better. There is absolutely no need to be charged 9% on your purchase of crypto.
- Ensure you are in a secure location when making your transaction for safety.
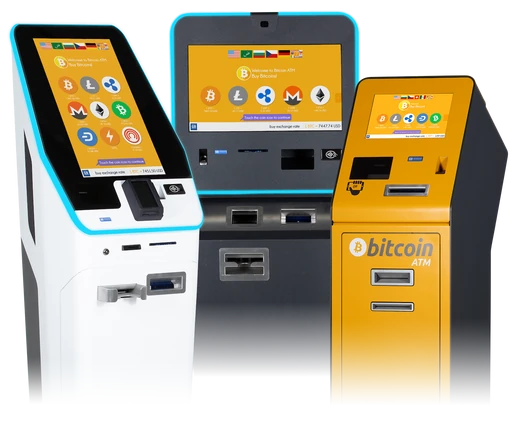
Step 2 – Go to the ATM
Verify identity
Approach the ATM and select the option to buy your desired cryptocurrency. Depending on the ATM, you may be required to verify your identity. This could involve entering your phone number, scanning your ID, or even taking a selfie.
Select the desired amount
After verification, select the desired amount for purchase. Insert the desired amount in cash in the machine. When the cash is in, the machine wants to scan your wallet QR code. The QR code is basically a representation of your wallet public address. Once scanned the transfer will be initiated to your wallet, confirm the transactions.
Some machines will offer a receipt as well to provide a printed confirmation your transaction details.
Method 4 – Cryptocurrency Wallets
Step 1 – Choose the wallet & requirements
Get started with crypto by utilizing an online wallet. Each wallet (either cold or hot) offers their own services to provide ‘on-ramping’ services. This means that they provide a service where you can use your FIAT money to purchase cryptocurrency. Each service again provides its own fees and structure.
Which wallet?
What wallet should you choose? It’s really up to you. We can mention a few but they each support their own features, networks, payment structures, fees, linked services, that we could write 1000 pages about each wallet. The most common used hot wallets are: MetaMask, Rabby, Trust Wallet, Exodus. Some centralized exchanges also offer their own decentralized ‘hot’ wallets. Then there are cold wallets, we invite you to read more about the most used Cold wallets here.
Requirements: Means to make the payment (bank transfer, credit card), and KYC documentation ready. Must have make a decision about which wallet to use for the next step. Time varies, but you could be done in 15 minutes depending on the payment method.
Once decided, proceed to the next step.
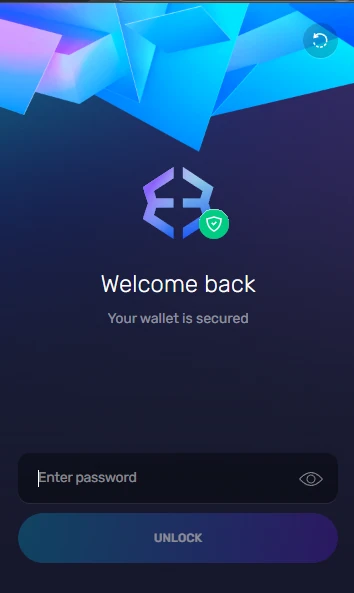
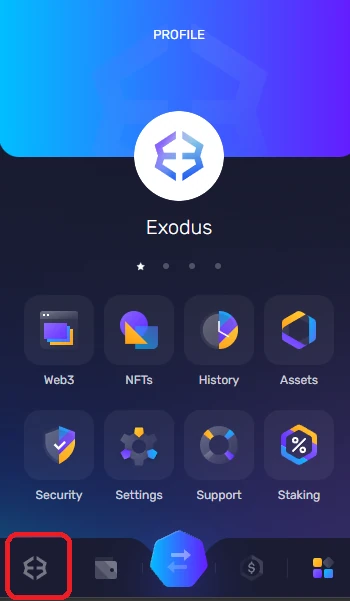
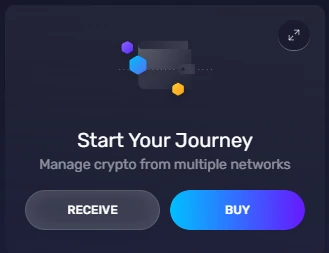
Step 2 – Example of purchase through a wallet
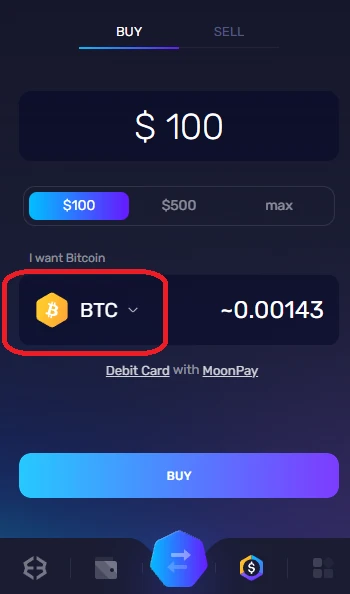
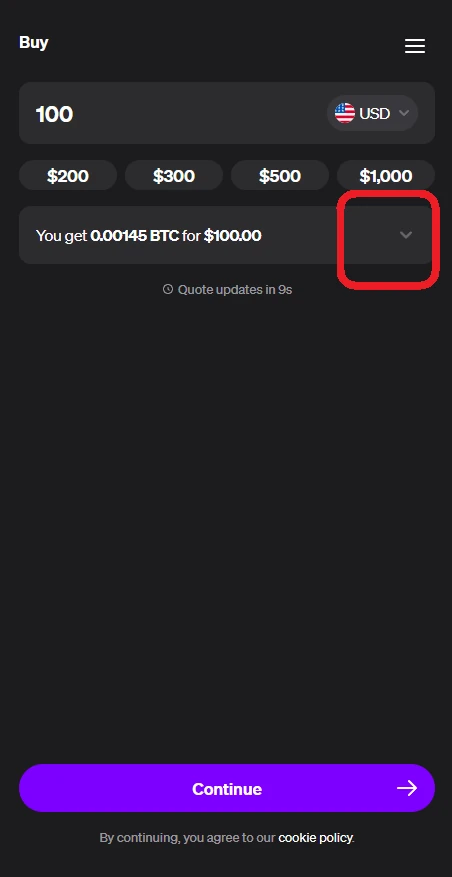
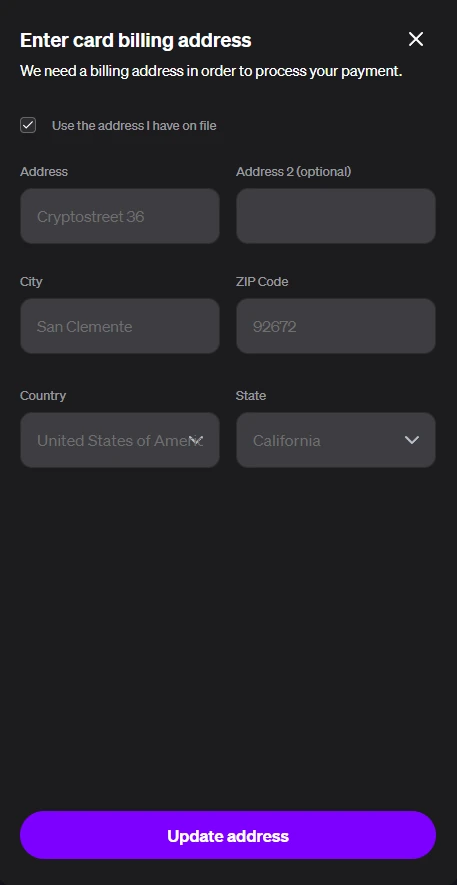
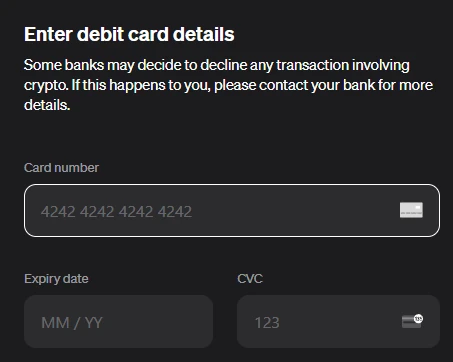
In this example we will be purchasing $ 100 worth of Bitcoin (BTC) on our Exodus wallet (browser extension version) with a credit card. You don’t buy directly at these wallets, but they are integrated with payment providers. These payment providers are required to do KYC. So unfortunately, that is were we break of the guide. However, after KYC it is just confirming and you are done.
Congrats! You have now purchased Bitcoin! 🎉
Disclaimer: This world develops fast. Some methods might change or might become obsolete over time. Currently, these are the widespread used methods to buy or sell cryptocurrency. Showing images and mentioning certain platforms is for demonstrations purposes only, it is never a recommendation to use any specific platform or service. The numbers used are fictional. Use everything at your own risk. This is not investment advice. NFA. Our resource only provides info on how to get started with crypto.